Processing Online Payments (Account and E-Commerce Orders)
If your business allows online payments, when customers submit them, the application can process those payments automatically. You can set this option globally and, for particular accounts, you can specify whether the payment is applied as the customer requests or not. This is true for both Balance Forward and Open Item accounts and allows for third-party payments to these accounts.
To take and process orders and payments online, you must have the Ecommerce parameter enabled and your Manage API Keys setting in the Support Utilities must be set to Active. The application accepts payments for ecommerce orders for accounts with card on file settings automatically. You can check with your ECI Support team to verify that these options are set for your business if you are unsure. You may also want to discuss applying Convenience Fees for this process (if allowed in your area), as letting customers to pay online using a card on file incurs extra fees for your business.
Setting the Online Account Payments Globally
The Payment Posting Rule allows you to apply the customer’s payment to their account as submitted. You can use these instructions to apply this rule to multiple accounts or use the instructions in the next section to apply the Payment Posting Rule differently to a specific account.
To set the online payment posting rule for many accounts:
1. From the Main Menu, choose Receivables > Utilities > Account Global Modify to display the Account Global Modify form.
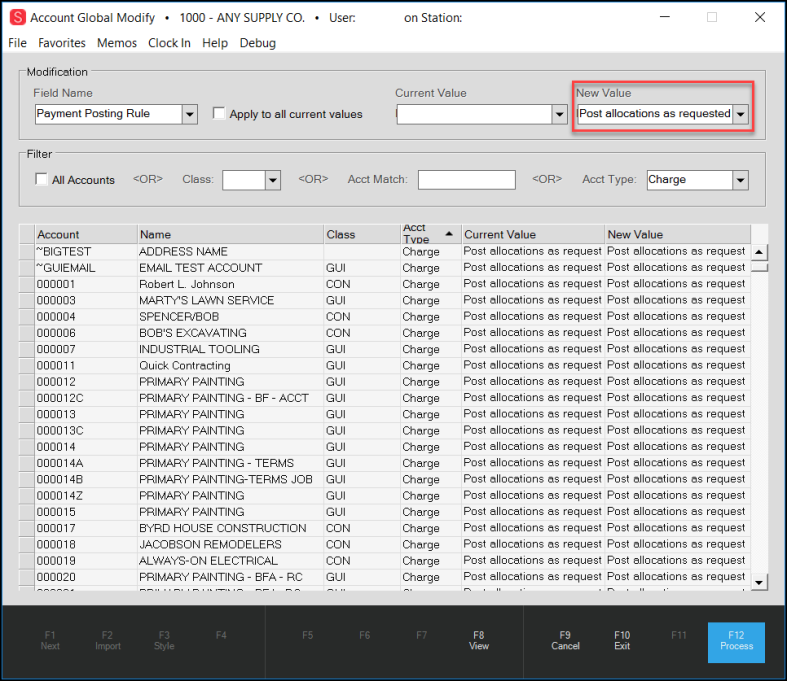
2. From the Field Name list, choose Payment Posting Rule.
Note: Since this feature is new, there are no existing values.

Account Global Modify with New Value Selected
3. In the New Value list, choose the value you want to apply to the selected accounts. Options include:
-
Post allocations as requested
Choose this option to post online payments to account balances automatically. -
Post ignore allocation request
Choose this option to prevent account payments using this posting process.
4. In the Filter box, select the criteria for which this value should apply.
5. Choose View (F8) to collect the accounts that match the filter criteria.
6. Review the list to ensure that they include the accounts you want.
7. When the list of account is right, choose Process (F12) to save this setting to each account.
If you have set this option for a group of accounts and decide it should not apply to a specific account, you can reset the Payment Posting Rule for that account using the instructions below.
Setting Auto Posting for Online Payments
You can post online payments automatically using a new parameter setting. You must have administrative rights to set this option.
To enable auto posting of e-commerce payments:
1. From the Main Menu, choose Maintenance > Database > Parameters to display the Parameter Settings form.
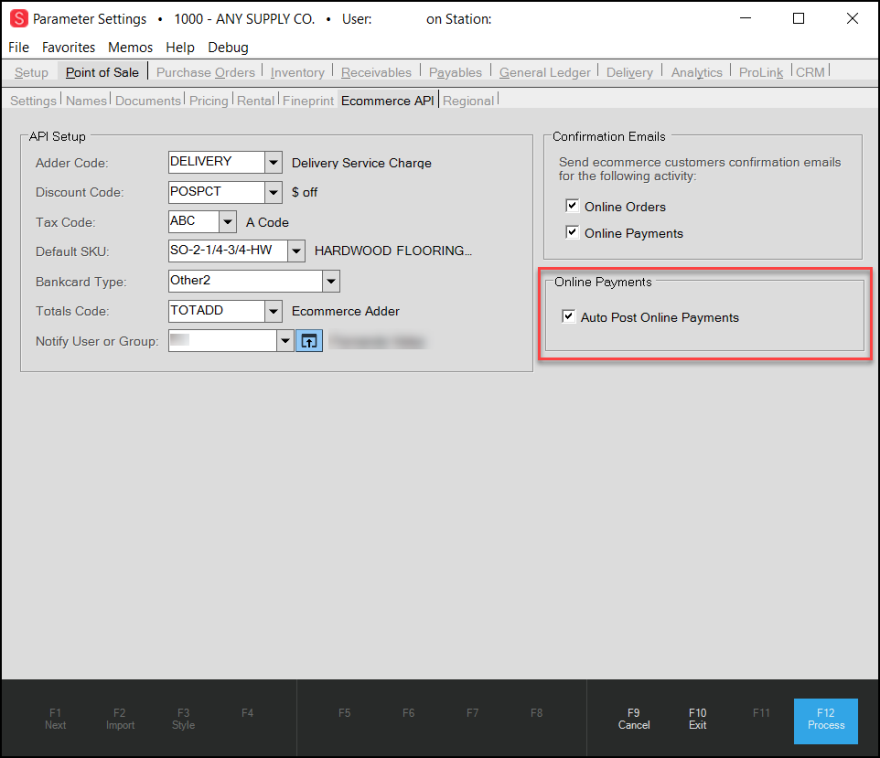
2. Choose Point of Sale > Ecommerce API tabs to display the Online Payment options.

Parameter Settings Form > Point of Sale > Ecommerce API Tab with Online Payments Highlighted
3. In the Online Payments box, select the Auto Post Online Payments check box.
4. Choose Process (F12) to save this change.
5. To ensure that this works for each of your branches that accept e-commerce payments, check your branch settings.
From the Database menu, choose > Branches to display the Branch Setup form.
6. In the Branch ID field, enter a branch you want to process payments for and press Enter.
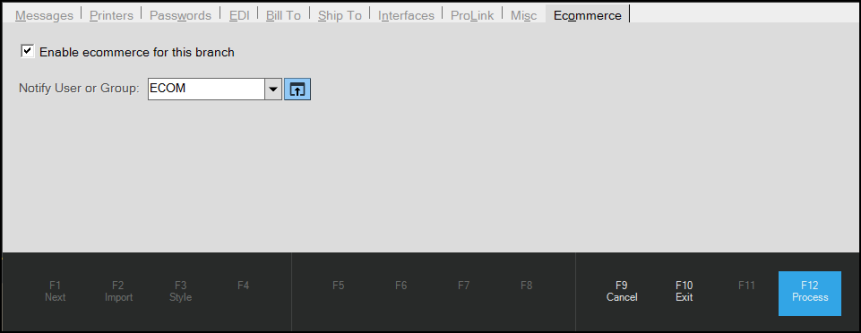
7. Choose the Ecommerce tab. The e-commerce options for the branch display.

Branch Setup Form > Ecommerce Tab
8. To enable e-commerce order processing for this branch, complete the following:
-
Enable ecommerce for this branch
Select this check box to enable e-commerce processing for this branch. -
Notify User or Group
Choose a user or a user group from this list to notify your staff when an e-commerce order has been submitted. Click the Settings icon to choose individual User IDs for this task and click Apply when you are done.
9. When you have completed these selections, choose Process (F12) to save them to the application.
Note: Check the branch settings by repeating steps 6 - 9 for branches that process e-commerce payments.
Setting the Online Account Posting Rule for a Single Account
You may want to prevent a particular account from posting their payments online automatically. Typically, if there is a card on file problem for an account, this might be the case.
To reset an account’s online payment handling:
1. From the Main Menu, choose Receivables > Database > Account to display the Account Maintenance form.
2. From the Account list, choose the account that you want to set the online payment handling for. The account details display.
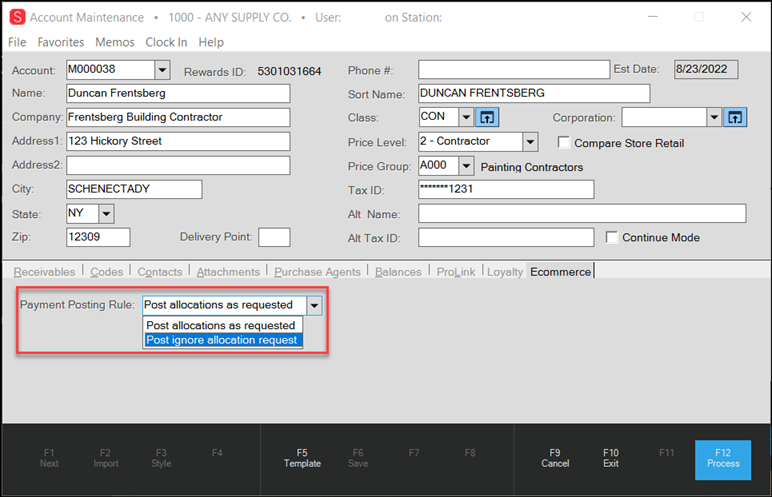
3. Click the Ecommerce tab to display the Payment Posting Rule that is currently associated with the account.

(Receivables) Account Maintenance > Ecommerce Tab > Payment Posting Rule List
4. Select the other ecommerce payment posting rule you want to use for this account.
5. Choose Process (F12) to save this setting.