Payment Entry Process
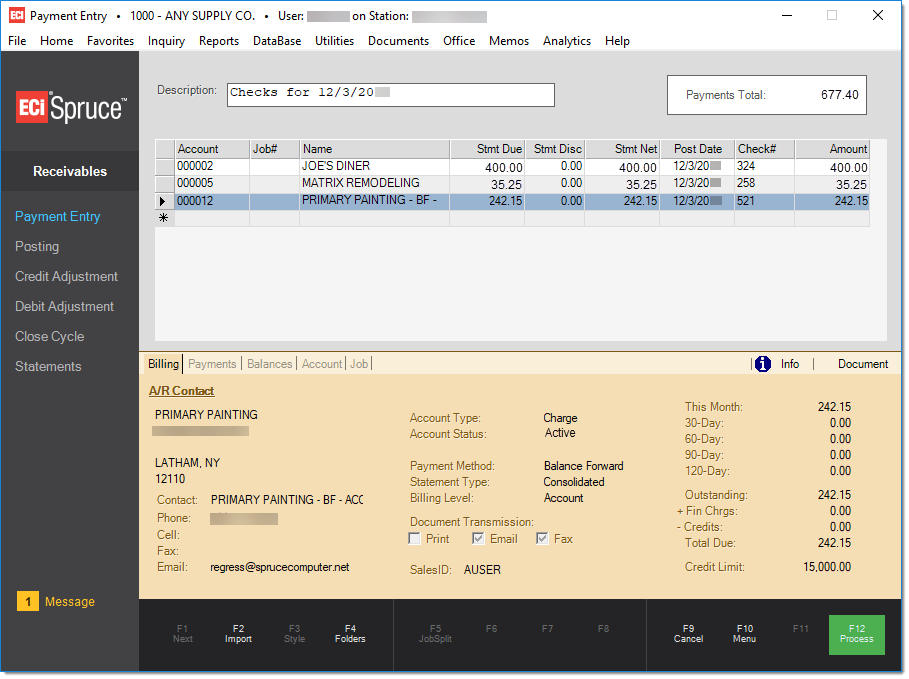
Payment entry is used for entry of checks received for payment of charges on their account. A "batch" style of entry is used. This is useful in situations where multiple checks are being entered at the same time (usually in preparation for a bank deposit). Entry will varies somewhat based on the account settings for the customer. For example, only job-level billing accounts default to prompt for entry of a job during payment entry. Payment entry does not apply payments to balances or open items (the Posting transaction is used for this).

The payment entry "description" is optional, but defaults to the text "Checks for" followed by the current date. Either accept the default description or use this to type a note or additional information describing the posting session. Descriptions are used as the "reference ID" for the document that is created when this payment session is processed. A "payments total" displays in the upper right-hand corner and shows a running total of all the checks that have been entered so far.
For each check, use to grid area to choose the account (alternate selection methods are also available), select a job if prompted, enter the check number, amount, and choose a post date. The customer's most recent statement totals (overall total due, discount, and net due) are included in the grid for reference. Note: these do not necessarily reflect the "current due" if the customer has made other payments since they were billed. Folders (F4) may be used to view the current balances and other information for accounts and/or jobs listed in the grid. Job selection is only allowed for customers who are assigned a billing level of job; otherwise, payments entered are considered to be consolidated (for the entire account).
Payments may also be imported from a file or existing document. If your company receives payments electronically, ask your bank if they can provide a file including the payments made. The Import (F2) function can be used to copy the account, job, check #, and amount from a delimited text file or spreadsheet. A number of delimiters are accepted including commas, tabs, and spaces.
Post Date
When entering payments, you can either accept the default "post" date or select another date. This date typically is considered the date the check was received (electronically, in person, or by mail), but may be adjusted to allow time for deposited checks to clear the bank. The post date affects the following:
•Eligibility for statement discounts that might be available based upon prompt payment (based on the discount date).
•Determines when a payment is available for posting.
Posting date defaults to the current date unless the "check clear days" parameter is in use (found in the Maintenance area, Database menu, Parameters option, and Receivables tab). If the check clear days option is used, the check clear days number is added to the current date to determine the posting date of the payment. This provides time to debit adjust a check payment off of an account prior to posting should it not be honored by the customer's banking institution.
Payments for Accounts with Installed Sales
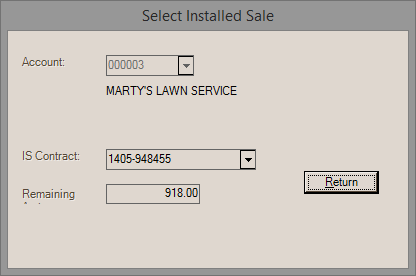
If a customer has open installed sales contracts, the "Select Installed Sale" window will open. If the payment is not for an installed sale, choose Returnwithout specifying an IS Contract. Otherwise, use the drop down to select the contract that this payment is to be applied toward.

Select Installed Sale
The Job Split (F5) function is used with job-level billing customers only. This billing level makes an assumption that the customer issue payments separately by job most of the time; however, there are cases when a job billing account might pay the balance of all jobs with one check. This specific situation is why this function was added. This option does not prorate the check across jobs, it just (a) copies all jobs into the grid for the customer and (b) sets the default payment amount for each job to that job's statement amount.
This function is only active after a payment "amount" has been entered in the grid and for accounts that are job billing. If the user enters a check amount before choosing Split Job (F5), the application will compare that entered check amount to the account's statement due amount and warn the user if they don't match (if the check amount is adjusted). The check amount entered is never used to determine the payment amounts.

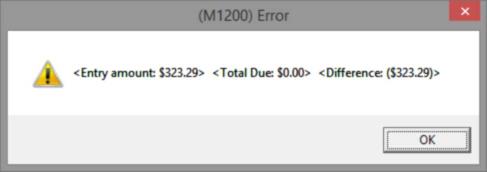
If an amount is entered that does not match the statement total due for ALL jobs, an "error" message is displayed; however, this is not an application error and does not need to be reported to support. It is simply a message to inform the user that the amount entered didn't match the statement amount due for all jobs.
Job Split is only designed for cases where the customer is paying their statement in fulland for all jobs. If the customer has current charges, they won't be considered in the comparison, so this wouldn't be used for an account "payoff" type situation.
The statement due amount for each job is the default amount no matter what "check amount" is initially entered. The "error" (warning) message is just an indication that the amount didn't match the total due and that adjustments to the check amounts may be needed to match what the customer actually paid.
A "consolidated" option is also provided in the Posting transaction that allows one check to be applied to balances or open items for all jobs.
Import (F2)
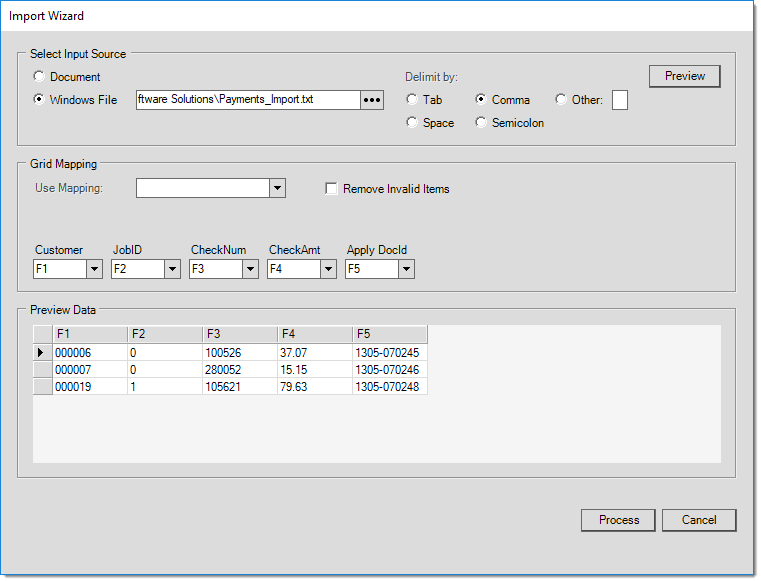
The Import (F2), Wizard function allows users to import payment data from either an existing document or an external file such as a spreadsheet or delimited file. We now allow the specification of a document identifier ("1306-046881," for example) to be specified along with payment information (account, job, check number, and amount are also necessary). Because this involves specific invoices, this only provides a benefit when the account (customer) is an Open Item account type. Balance Forward type accounts don't maintain details, just balances, so this would not provide any benefit when used for a Balance Forward type customer. The document (if any) must be associated with either a valid invoice (open item) or direct ship (invoice).

Import (F2), Wizard
For any payments associated with an "Apply DocId" via Import (F2) that are later applied to open items, the Posting transaction will automatically fill-in the "to apply" amount on the associated invoice. The invoice must still be open (unpaid) and the account must be an "open item" type customer. This is similar to how returns (credit memos) associated with original invoices function when Posting to open item accounts.
If the check number is set to "Online," the option "Payment by Invoice" found on the Post All Credits dialog can be used to apply just "online" payments to open item invoices or balances.
Style (F3)
To coincide with allowing document specification with the Import (F2), Wizard, a grid style named "Import" is provided. This feature displays a read-only grid listing the documents (if any) associated with the payments. Choose the style "Entry" from to return to an editable version of the grid.

Import Style (F3)
Processing
When processing (F12) a payment session, a document is generated and the payments will be available for posting. Once a session has been completed, it is no longer accessible (other than as a document) and is not used during the posting process (as a batch). After processing (F12), only the individual payments entered are available for posting.