Auto Bill of Materials
The Auto Bill of Materials (Auto BoM) feature is intended for simple manufacturing processes that don't require the added functionality and overhead associated with the full manufacturing features provide by the
Begin by creating a material list that contains all of the items needed for the product. This provides a single item ID suitable for one-step processing, similar to manufacturing. The Auto BoM converts that list into an item you can use in a sales or order transaction.
Auto BoM Restrictions
The following restrictions apply to the Auto BoM feature:
-
When a customer returns an Auto BoM item, you cannot return the components to stock.
The on-hand quantity will increase for the Auto BoM parent SKU, crediting the sale and cost of sale for the Auto BoM item only. The same applies to Vendor returns. -
Auto BoM items cannot be used in Direct Ship transactions.
-
You cannot add Auto BOM items to Manufacturing > Work Orders.
-
You cannot transfer Auto BoM items to another location.
-
On-hand quantities of 0 are permitted. Material quantities are manually adjusted if the on-hand quantity is greater than 0. If the on-hand quantity of an Auto BoM item falls below 0, the application creates a work order for the item.
Setting up an Auto Bill of Material (Auto BoM) List
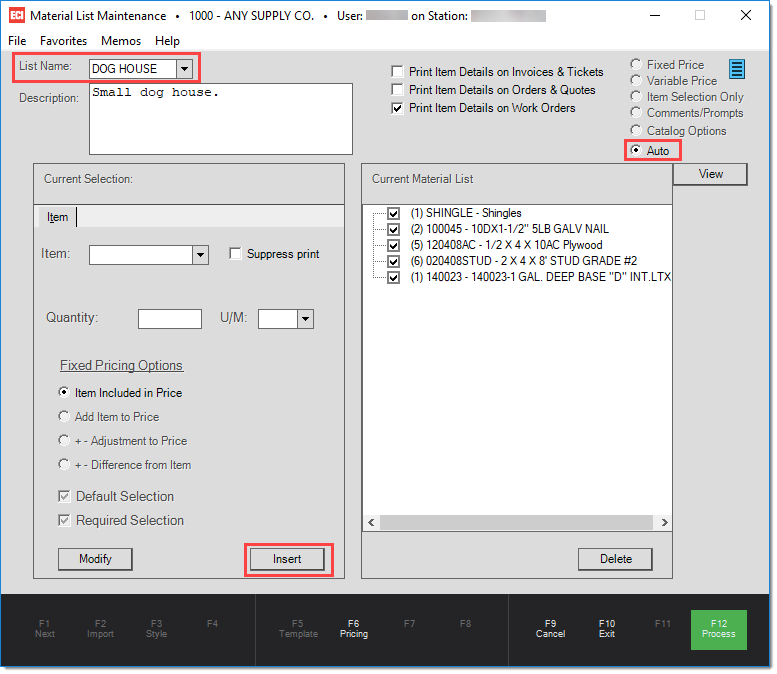
1. Create a new Material List by choosing
a. Enter a List Name, a description of the material list, and select Auto from the actions list.
The Auto field is a mandatory selection in order to continue on with the Auto BoM feature.
b.
c. In the Current Selection section, use the Item list to find each of the required items and click Insert to add them to the to the Current Material List. The Current Material List should reflect all items required to create the product. Pricing and other factors will be defined later during the Item Maintenance step.
You may delete or modify items by selecting the corresponding controls.
d. When the Material List is complete, choose Process (F12) to save it.
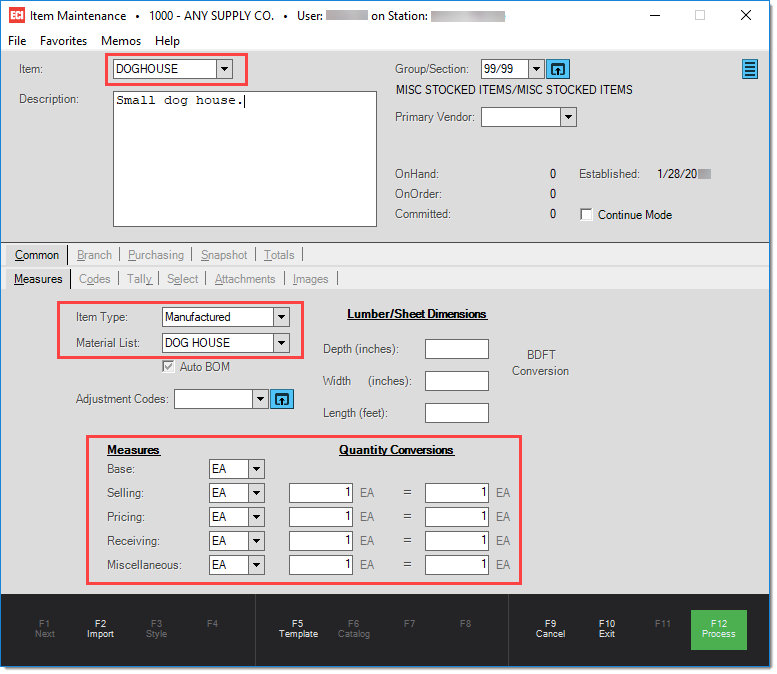
2. Open the Item Maintenance form by choosing Inventory > Database > Item.
a. In the Item and Description fields, add a new item ID and description for the Auto BoM list.
Note: The Item ID name cannot be the same as the Material List name.
b. On the Common / Measures tab, from the Item Type field, select Manufactured.
c. From the Material List drop down, choose the Auto BoM you created in the first step.
You must select a list that used the "Auto" option in Material List Maintenance.
d. In the Measures and Quantity Conversions fields, enter the settings for this list as appropriate.
3. On the Common > Codes tab, set the Track Qty field to Y.
4. On the Branch > Codes tab, set the Stocked field to Y.
5. On the Branch > Pricing tab, set the pricing for the Auto BoM item.
6. Choose Process (F12) to save the new Auto BoM item.
Note that if the mandatory fields are not set, a task list will appear.
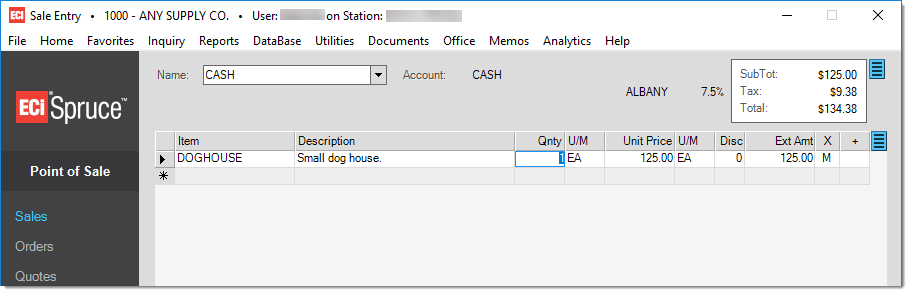
Using Auto BoM at Point of Sale
To add an Auto BoM item list to a Point of Sale transaction, add the item you created in the data grid.
If all items listed in the Materials List are on-hand, you can process the transaction normally.
If some or all of the items in the Auto BoM list are not available, a work order will be created for the missing items when you choose Process (F12).
Quick Links
Material Lists
Item Maintenance