Receivables > Inquiry > Status
Use this path to create Account Interim Statements for a specific account. We have expanded the Statement settings to give you a way to add all of the relevant credit and debit documents associated with the account's current statement. The Account Interim Statement provide your customer a more comprehensive view of the account's current standing, by including supporting documents like:
-
Sales invoices and adjustments
-
Direct shipment invoices
-
Charge returns
-
Cash or credit payments
-
Installed Sales
You can print these documents, save them locally, email them, or fax them directly according to their needs/requests. You can print these documents using a variety of print configurations (1-up, 2-up, 4-up, single file, non-single file, landscape-oriented document style). These settings are described in the next section.
Note: Tax Invoice style documents are only available as a 1 invoice per document reprint.
Setting up the Application to Support the Account Interim Statement
There are two receivables parameter settings that are important for the Interim Statement. One specifies the way the invoices are printed (one per page, two per page, or four per page), and the other allows the statement and the supporting documentation to be generated as a single print job or saved as a single file. Both of these settings are optional. The application shares these settings with the month-end statement run, so any changes to these parameters will affect both Interim Statement and month-end statements.
Note: If you do not set the Print Invoices and Statement as a Single File parameter, the application produces two documents when you include open documents in the Interim Statement. This will require two print jobs, create two attachments for email and fax jobs, and require two separate files when you save the statement documents locally.
To choose options that affect the creation of Interim Statements (and month-end statements):
1. From the Main Menu, choose Maintenance > Database > Parameters > Receivables tab. The Receivables tab options display.
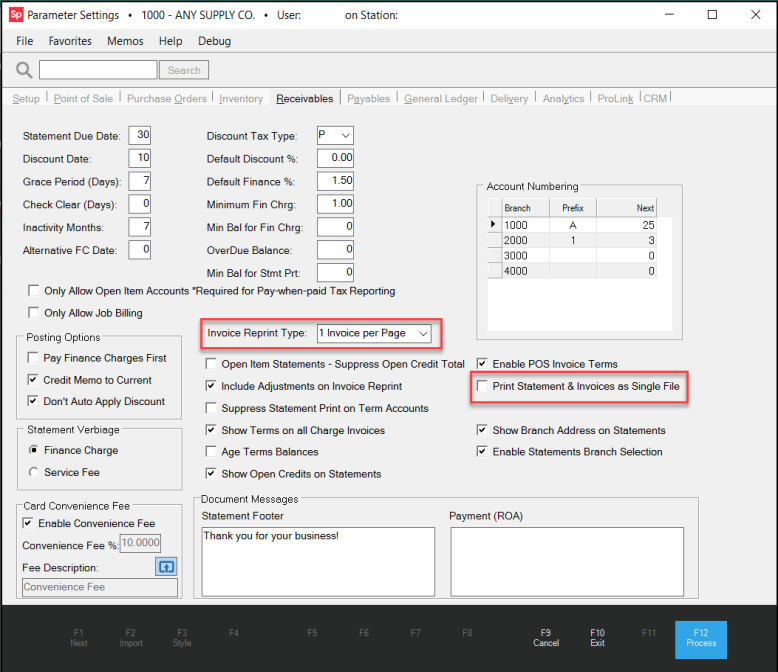
Parameters – Receivables Tab with Interim Statement Options Highlighted
2. Check the entry in the Invoice Reprint Type field. Choose the option that sets the number of invoices you want to print/display per page.
Note: When you email, fax, or save the statement locally, the application uses the 1 Invoice per Page type by default.
Important: The option you select here also determines the printing style for the monthly/period ending statement. Make sure that you set this option to serve your needs for both statement types.
Landscape Printing Note: If you use the Tax Invoice style document for Invoices, select the 1 Invoice per Page option for optimal printing results.
3. Check to see if the Print Statement and Invoices as a Single File check box is selected and consider these options.
-
To include the Interim Statement and all supporting documents in a single print job or file, select this check box.
-
To print the Interim Statement and any supporting documents as separate print jobs or files, leave this check box unchecked.
4. Click Process (F12) to save these settings.
Generating an Interim Statement for an Account
To generate an interim statement for an account:
1. From the Main Menu, choose Receivables > Inquiry > Status to display the Account/Job Status form.
2. From the Account list, choose the account you want to create the Interim Statement for. The Account Details display.
Note: If the account has jobs associated with it, the Jobs list also displays. You can choose a job from that list to specify a specific job to create an interim statement (and specified documents) for the job instead.
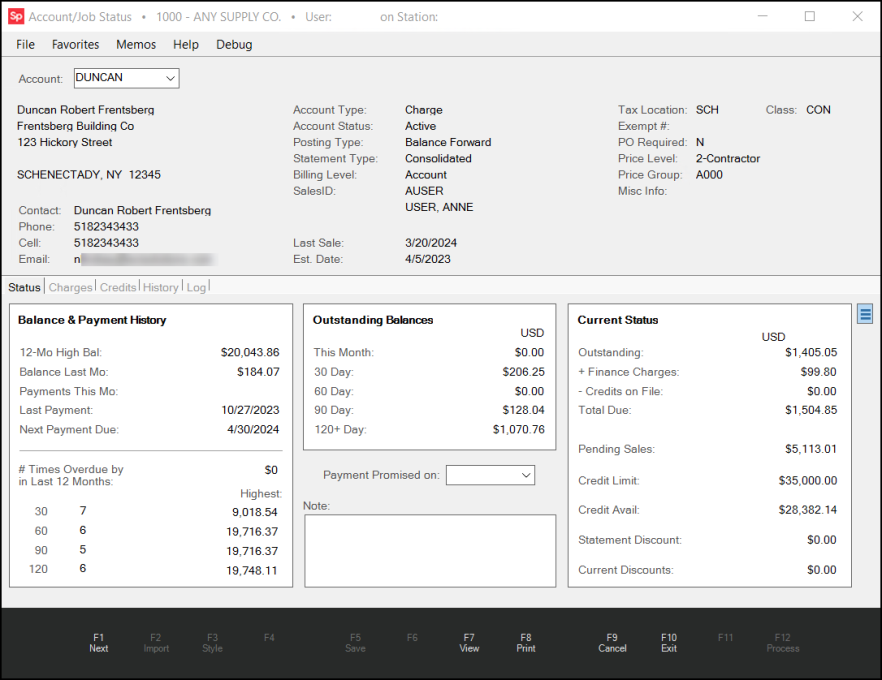
Account/Job Status Form Before Interim Statement
3. To create the Interim Statement, click the Print (F8) button. A context menu displays.
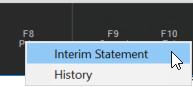
Account Job Status Form – Print Context Menu
4. Choose Interim Statement. The Process Session Document options display.
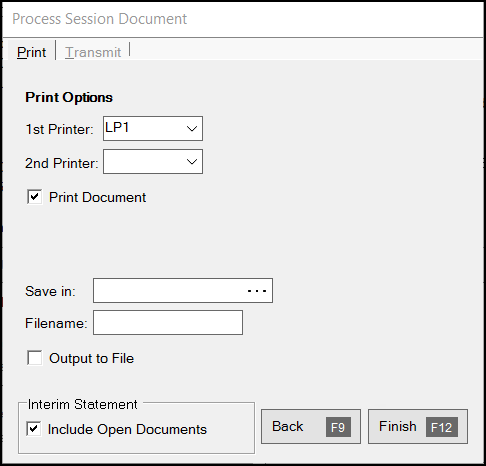
Account/Job Status Form – Process Session Document
5. Choose whether to produce the Interim Statement or the Interim Statement and any supporting invoices, credit documents, returns, etc. for the statement period.
-
To provide just the Interim Statement with no supporting documents, uncheck the Include Open Documents check box.
-
To provide the Interim Statement and all supporting documents for the reporting period, leave the Include Open Documents check box selected.
Note: The Include Open Documents check box is selected by default, if the Account is set to Reprint Invoices in Account Maintenance.
6. Decide how you want to deliver the Interim Statement to your customer, by choosing one or more of the following delivery options:
-
To print the Interim Statement materials, leave the Print Document check box selected and choose the printer in the 1st Printer list.
-
To save the Interim Statement materials to a file, beside the Save In field, click the Ellipsis
 icon and choose the file location to save the file to.
Then, in the Filename field, type the name of the Interim Statement with a .PDF suffix. Select the Output to File check box.
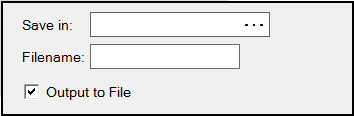
Process Session Document – Save Output to File Options
-
To send the Interim Statement materials via email, click the Transmit tab. The Transmit tab options display. The Email subtab displays by default.
In the Email To field, type the appropriate email address for the customer. Typically, this is the Contact 0 record.
In the From Addr field, enter the email address you would like the customer to use to respond, if needed.
In the Notes field, enter any additional note you want to send to the customer.
![]()
Process Session Document – Transmit > Email Subtab Options
-
To send the Interim Statement materials by fax, click the Transmit tab and then the Fax subtab. New Transmit tab options display.
Select the Fax Document check box and complete the Fax To, Fax #, Company, and From field entries.
To add a message, type it in the Notes field.
![]()
Process Session Document – Transmit > Fax Subtab Options
7. After you have selected your delivery options, click Finish (12) to produce/send the statement materials you specified.
Note: If you do not set the Print Invoices and Statement as a Single File parameter, the application produces two documents when you include open documents in the Interim Statement. This will require two print jobs, create two attachments for email and fax jobs, and require two separate files when you save the statement documents locally.