Setting up the Remote Client Utility on a Station
As we move into the future, Spruce will rely more on the Remote Client Utility to provide secure, reliable access to your system and application data. The Remote Client Utility is the software that connects your application to the cloud servers that contain your data. Each station that accesses the application will need to use Remote Client to improve processing speed and reliability. Updates we are making to Remote Client will mean fewer check out delays and less time spent fighting with printers or card readers.
Using Remote Client (Custom) Pairing to Connect Workstations to Hosting
Custom Pairing is a streamlined self-service feature that makes it easy to connect your local workstations to the application in the hosted environment using the Remote Client Utility — without requiring technical expertise or manual configuration steps.
Understanding the Remote Client (Custom) Pairing Process
You can begin by clicking the Remote Client Utility  icon in the Left Menu or click Pair Now in the station’s Device Maintenance form to receive a ready-to-use installer link. You double-click the installer and the system downloads the appropriate msi for your platorm. Starting the installer handles everything else — enabling the station, generating a PIN, building a secure download link, and defaulting to a safe configuration that won't disrupt existing workflows.
New pairings created through Remote Client Custom Pairing safe default to a station type called Pair Only (No Devices). This means:
-
The Remote Client is connected and available for updates, portal access, and future capabilities.
-
No devices (printers, bank card readers, cash drawers, scanners, signature pads, etc.) are routed through the Remote Client initially.
-
Existing VPN or locally connected devices continue to work as before.
The safe default process allows you to roll out Remote Client connections across the entire organization without disrupting the current device’s workflows. You can upgrade stations later to full device routing when that feature is ready.
Note: The previous default station type has been renamed from Standard Station (Default) to Paired (with devices) for clarity.
The Remote Client Utility  icon is in the Left Menu from every application form — including during active transactions. You do not need to leave your current workflow to start the pairing process.
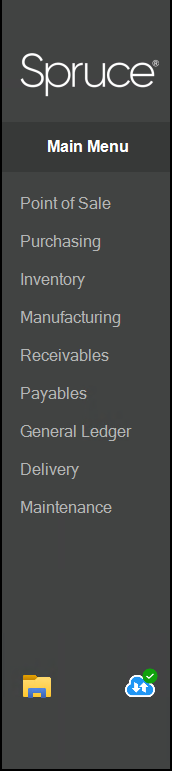
A subtle red badge on the Remote Client Utility icon indicates when the station is not yet paired. Clicking this icon opens a clean, customer-friendly pop up — not a technical troubleshooting console. You use this process to download the appropriate Remote Client msi file to the Downloads folder. Then you can double-click it to start the installation process.
The Remote Client Utility icon displays the current pairing status in the Left Menu in the application.
| Status | Description | Icon |
|---|---|---|
| Not Configured |
The workstation has not begun the pairing process with the hosted system. |
|
| Configured, Not Paired |
The workstation’s PIN displays, but it has not yet paired with the hosted system. |
|
| Paired |
The workstation is paired with the hosted system. |

|
This is a one time process, so when you complete it and the Paired icon displays, you need never run this process again.
Note: If you close the application before completing the pairing process, you can return later and pick up where you left off — the process preserves the PIN and you can recopy the installer link at any time.
Station One Note: You cannot use the Remote Client (Custom) Pairing process for Station One workstations because they have different configuration requirements.
Requirements for Enabling Remote Client (Custom) Pairing
Before you get started, Remote Client (Custom) Pairing requires these environmental settings:
1. You must be running the application using the (SoftLayer) Hosted Environment, which is specified in the Parameter Settings form > Setup > Software tab. This Pairing process is not available for on-premise systems.
2. You must have Remote Client seats available.
If all seats are in use, the pairing option will be hidden or display a message indicating that no seats are available.
3. Your business must have the Remote Client Web Service URL configured in the Parameter Settings form. Check with your Support team if you are experiencing an issue. If this setting is missing, pairing will be blocked.
4. You must be using the application version 33.0.0 or a custom 32.0.2 version.
5. Support needs to enable the Temp_LBMH03_9449_CustomPairing feature flag. The feature flag can have one of the following statuses:
-
Enabled: The full Remote Client (Custom) Pairing experience is available from the Left Menu or using the Pair Now setting in the Device Maintenance form.
-
Disabled: The new pairing interface is hidden. However, any stations already configured as Pair Only (No Devices) continue to function as they did before. The device routing remains suppressed for those stations, and they can still be viewed and managed in Device Maintenance.
Note: The feature flag is temporary and will be removed after roll out is complete. No additional configuration is needed.
Running Remote Client (Custom) Pairing Using the Left Menu
We recommend this process for custom pairing your workstations with the Remote Client Utility. Users with station log in permissions can complete this work using their standard credentials.
To run the Remote Client (Custom) Pairing process using the icon in the Left Menu:
1. Log into the application using your user credentials.
2. From the Left Menu, double-click the Remote Client Utility icon.
The red badge indicates the station needs pairing. The Remote Client Connection box displays. The system enables your station, generates a PIN, and copies a secure installer link to your clipboard. The PIN number displays on the screen.
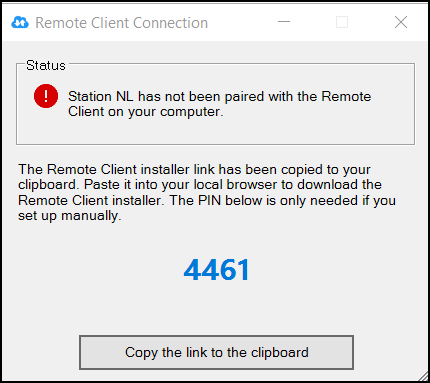
3. Click Copy the link to the clipboard and log out of the application.
4. Open a web browser, paste the link from your clipboard into the address bar, and press Enter. The Remote Client Download Portal displays. The portal checks the link to determine the version of software the application is running.
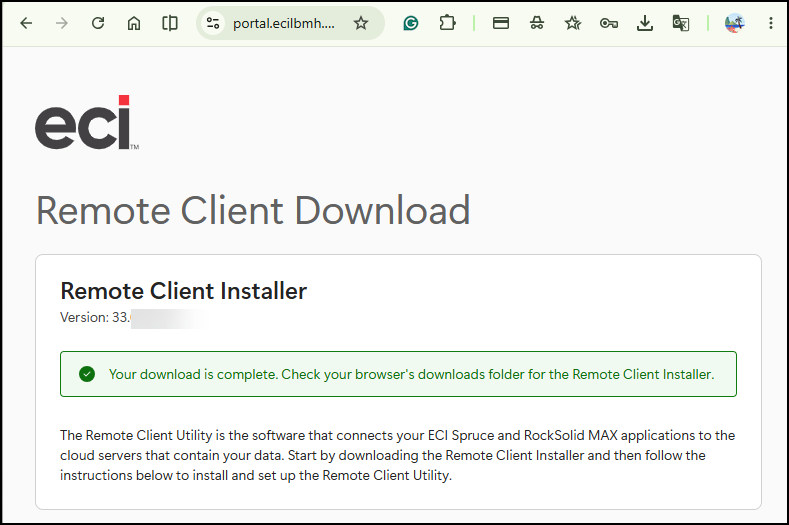
The portal downloads a pre-configured installer to your Downloads folder.
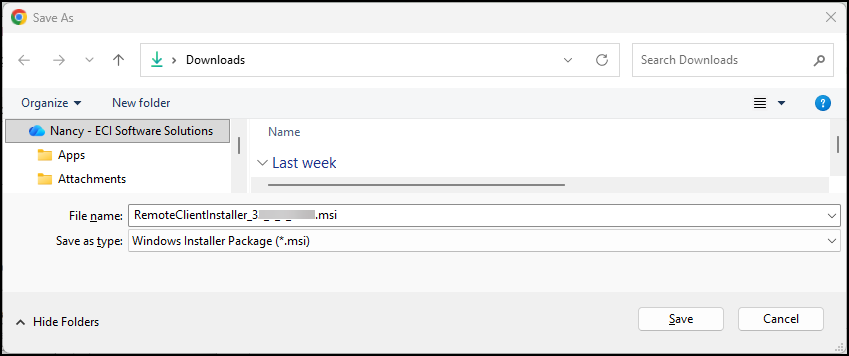
5. Click Save to download the Remote Client Installer msi file.
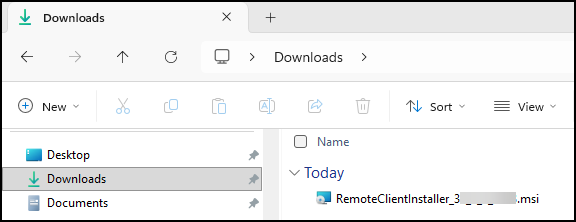
6. Open the Windows File Explorer, go to the Downloads folder, and double-click the Remote Client Installer MSI file. The Remote Client Service Setup (Wizard) displays. See Installing the Remote Client Service on the Station for instructions.
During the Remote Client Installer process, the Remote Client pairs automatically using the PIN from step 1.
Running Remote Client (Custom) Pairing from Device Maintenance
Use these instructions to start the Remote Client Custom Pairing service from the Device Maintenance form. Users with station login permissions can complete this work using their standard credentials.
To run the Remote Client (Custom) Pairing process from the Device Maintenance form:
1. Log into the application using your user credentials.
2. From the Main Menu, choose Maintenance > Database > Devices. The Device Maintenance form displays.
3. From the Device Name list, choose the station’s ID. The station settings update.
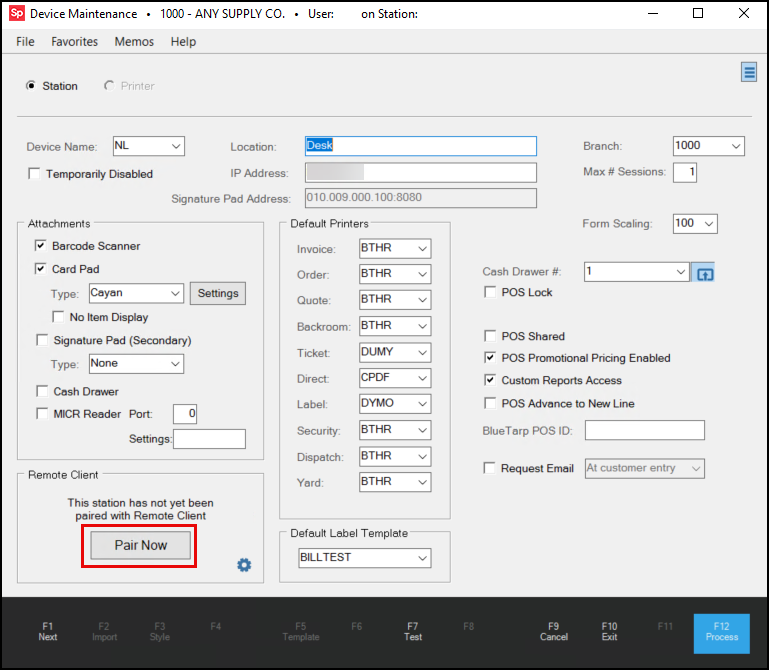
4. In the Remote Client box, click Pair Now. The Remote Client box updates to show the Copy Installer Link button and the pair ID.
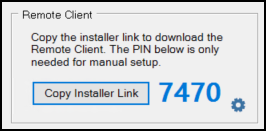
Note: Admins who click the Gear icon, can review the Remote Client pairing type, Pair Only (No Devices). In the future, there will also be a Paired (with devices) option for adding third-party devices.
5. Click the Copy Installer Link button, paste it into your browser, and press Enter. The Remote Client Installer downloads the right installer file to your downloads folder and displays this message:
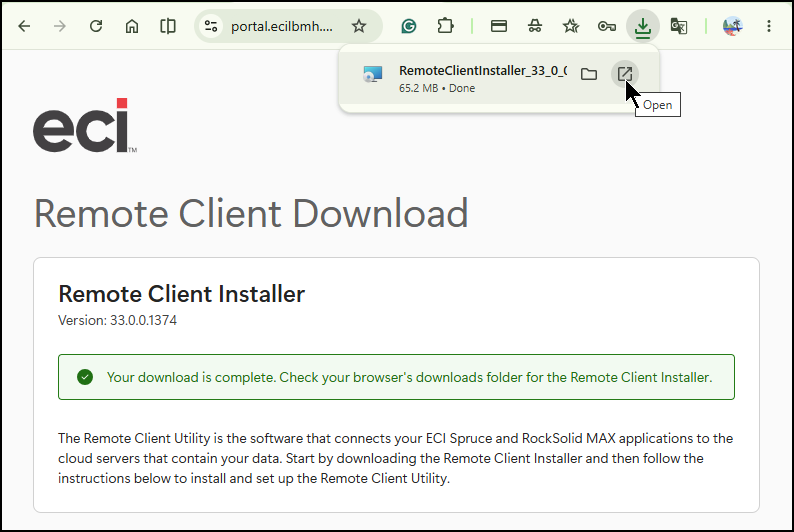
Note: The version number matches the current version installed on the station.
The Save As > Downloads form displays:
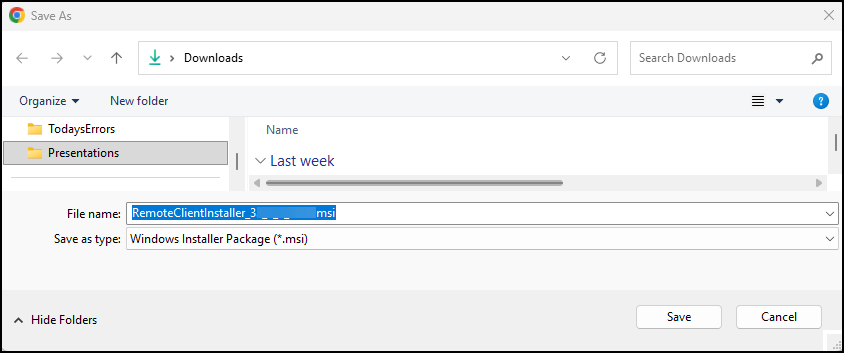
6. Choose Save to save the new Remote Client Installer file to the Downloads folder. The installer downloads.
7. Click Open.
Now you are ready to begin the Remote Client Setup Wizard process as described in Installing the Remote Client Service on the Station.
During the Remote Client Installer process, the Remote Client pairs automatically using the PIN from step 1.
Installing the Remote Client Service on the Station
After you download the Remote Client Utility installer, follow these instructions to install it using the downloaded MSI file so the system can pair it with the station. In general, follow the prompts that display and click Next to continue.
1. Navigate to your Windows Downloads folder and double-click the installer msi file.
The Welcome to Remote Client Service Setup Wizard displays.
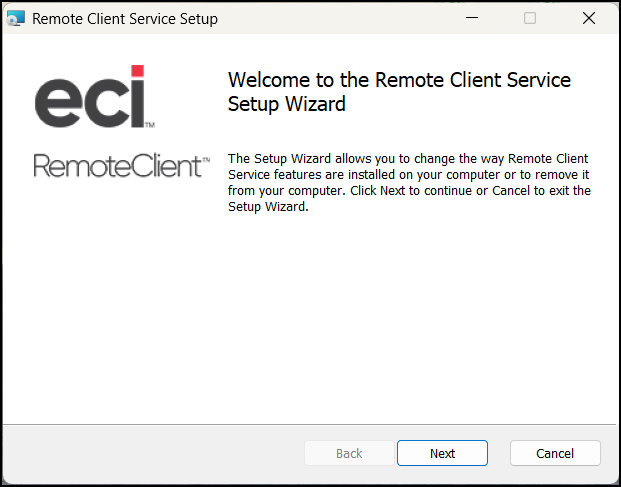
2. Click Next. The Agreement for Remote Client Installer displays.
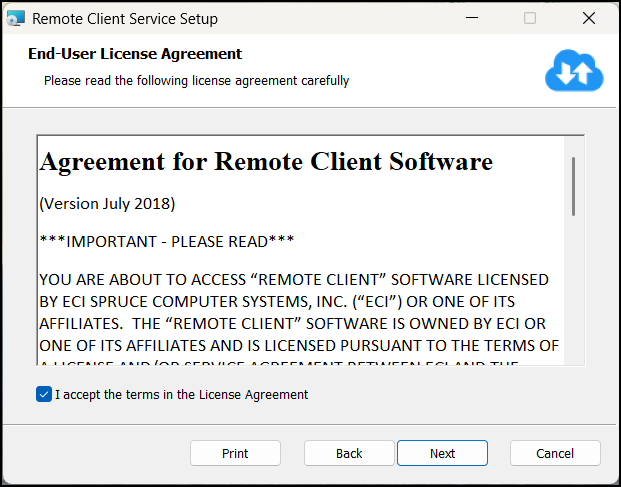
3. Check I accept the terms in the License Agreement check box and click Next.
The Destination Folder displays so you can choose or confirm the installer folder. You can change the folder if you prefer by selecting the Change button.
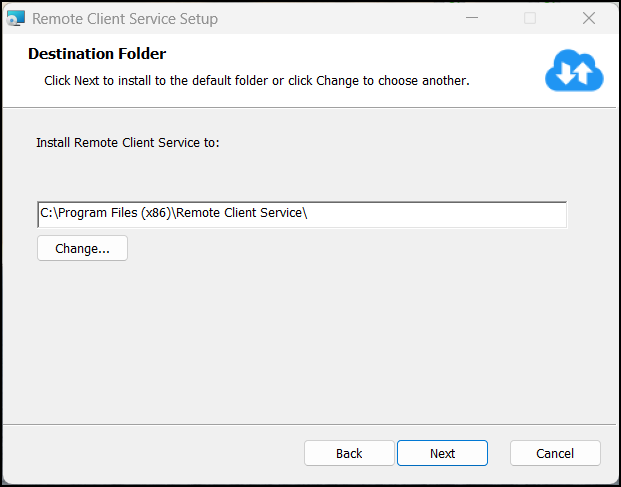
4. When the path for the installer is set click Next.
The Ready to Install Remote Client Service form displays.
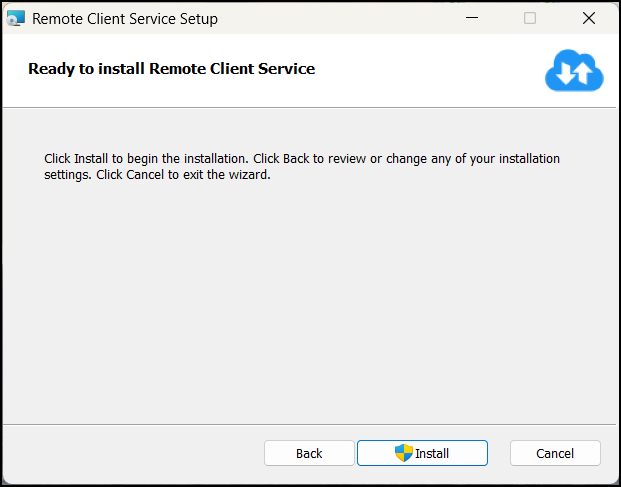
5. Click Install. The system prompts you to accept that you are beginning the installation; click Yes. If you have run the application recently, the Files in Use box may display.
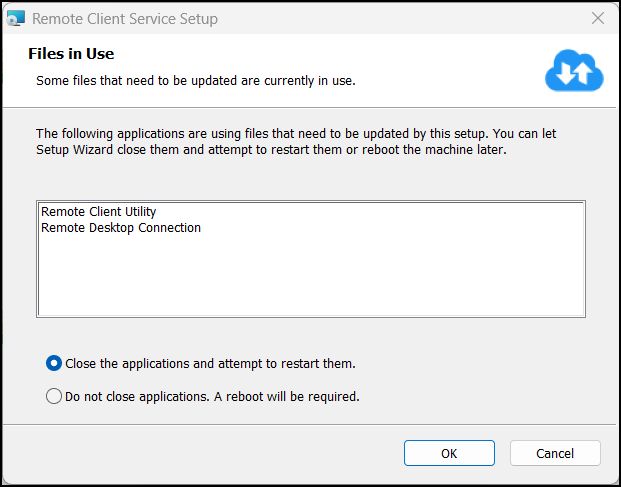
6. Choose Close the applications and attempt to restart them, and click OK.
The Wizard shows you the installation progress and when the installation is complete, displays this message:
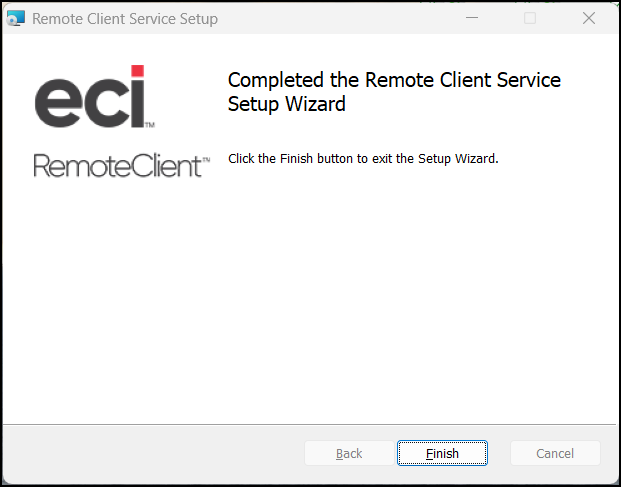
7. Click Finish to complete the installation.
When Custom Pairing is complete, the Remote Client Utility icon in the left menu displays with a check box in it.
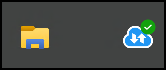
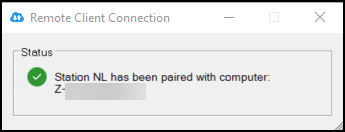
When you double-click this icon after the pairing process is complete, a status message displays the computer name of the station:
Re-Copying the Installer Link
If you need the installer link again (in cases where you cleared your clipboard or need to share it) you can follow these steps:
1. Click the Remote Client Utility icon in the Left Menu. Your existing PIN will display.
2. Click Copy the link to the clipboard to get a fresh installer link.
3. Paste the link in your browser and proceed with the download using the instructions above.
Device Pairing for Administrators (Not Yet Implemented)
The simplified Remote Client (Custom) Pairing flow covers the most common scenario. System Administrators will be able to set the Remote Client type to include additional devices in the future.
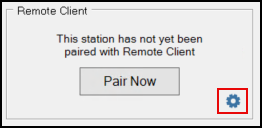
1. Click the Gear icon in the Device Maintenance form to display additional configuration options.
Note: The Paired (with devices), POS Assured Appliance, and SmartKiosk options are not yet available.
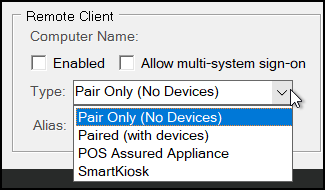
2. From the Type list, you will be able to change Remote Client types, to configure aliases, set up SmartKiosks or POS Assured devices, and manage multi-system sign-on.
-
Pair Only (No Devices)
This is the default for new Custom Pairings. Remote Client is connected to the station, but no devices are routed through it. This is currently the default.
-
Paired (with devices)
In the future, you will be able to use this to add printers, card readers, and other peripherals through the Remote Client. This feature is not yet available.
-
SmartKiosk, POS Assured Appliance, etc.)
In the future, these options will allow the Remote Client utility to support SmartKiosks, POS Assured, and other specialty devices that require more complex configuration settings.
3. You would choose Process (F12) to save the new setting.
Remote Client (Custom) Pairing FAQs
For more Remote Client (Custom) Pairing FAQs and Answers, click here.
What's Next: Rapid Entry and Global Sign-On