What's New: Updating Printer Settings to Convert from Cloud Hosting
When you are ready to convert your printers from Cloud-hosting to work locally, follow the instructions below to complete this process. You must complete Custom Pairing before you start this work.
This work is not yet complete.
Downloading and Installing the new Printer Drivers for Cloud Hosted Printers
After you complete the Custom Pairing process for a station, you may notice that there is a new Devices tab in your Remote Client Utility.
1. Click the Devices tab.
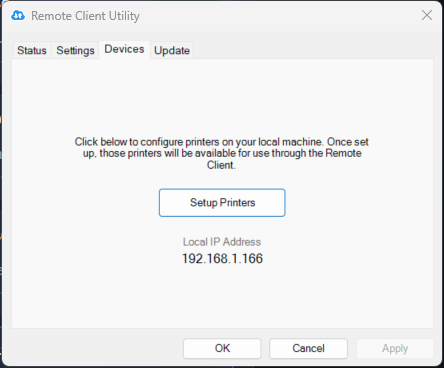
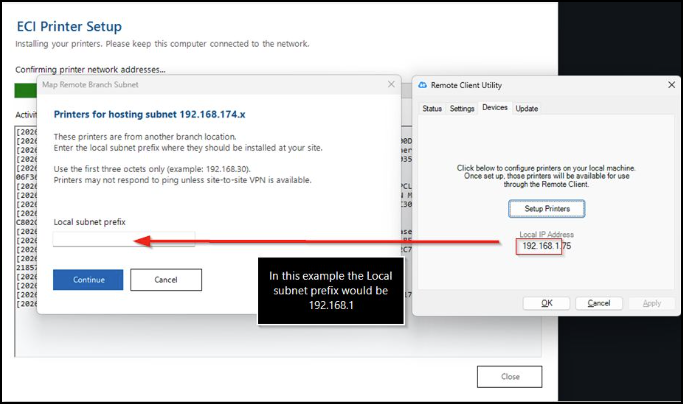
2. Make a note of the Local IP Address (the subnet for the workstation), because you may need it later.
3. Click the Setup Printers button, the ECI Printer Setup form displays.
This Printer Download Utility will help you download and install the new drivers you require for the printers associated with your station so you can transition from the Cloud-based process to running the printers locally.
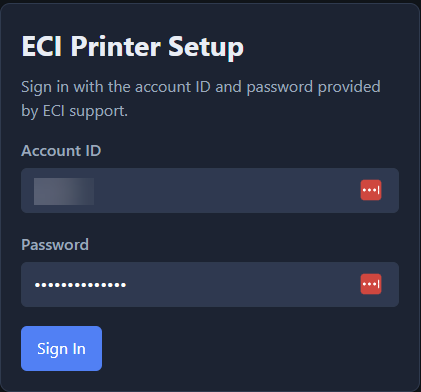
4. Enter your business's Account ID and Password and click Sign In.
Support will provide you with an account ID (your NetSuite ID) and a password for your business, which you will use to access the settings for the printers in your cloud instance.
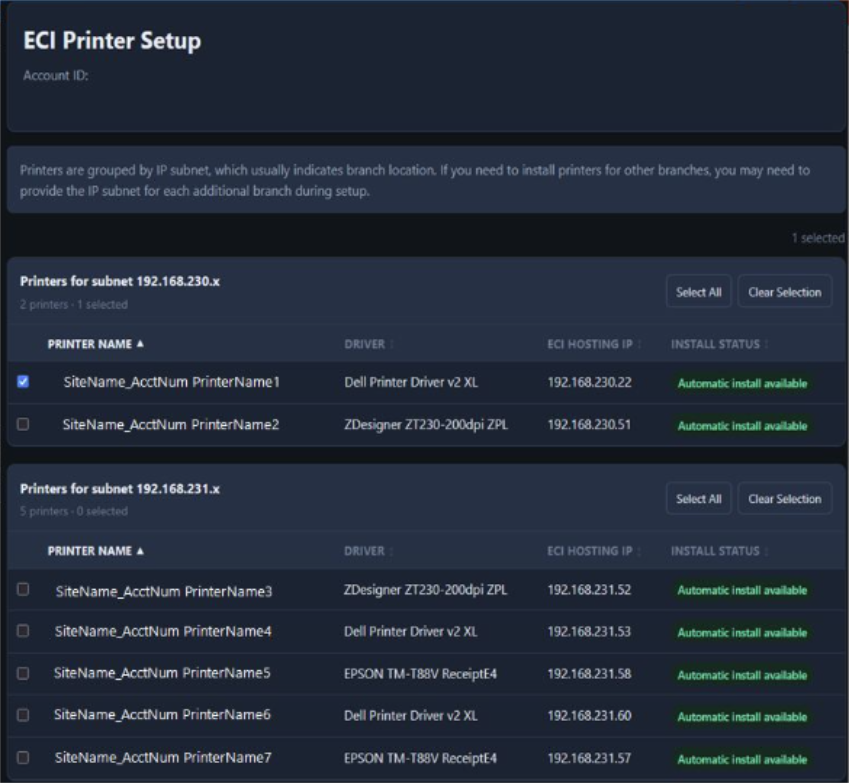
5. Click the check box beside the printer drivers you need for the local station.
6. Scroll to the bottom of the page and select the Download Installer button.
Each Subnet represents a different network location, which most likely indicates a different location/site.
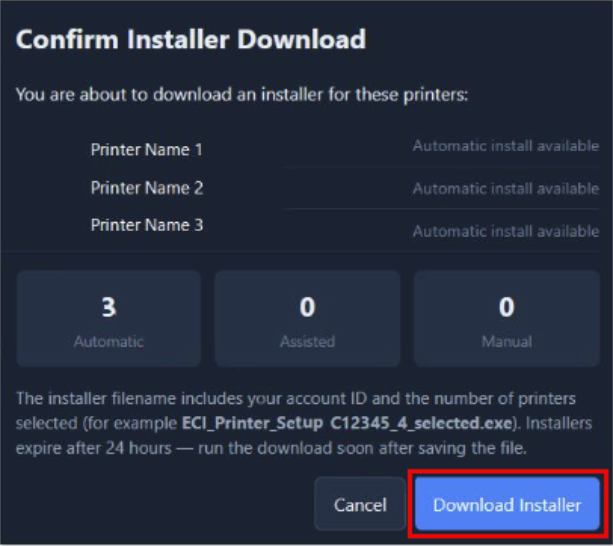
The Download Utility saves the new printer drivers for the printers you selected to your Windows Downloads folder.
7. Navigate to the Downloads folder where the printer drivers were saved and locate the first printer driver you want to install. You can find the Downloads folder using the Browser settings shown below.
 ......
8. Double-click the driver you want to install to begin the Install Driver Utility process.
Note: If the Which subnet is this workstation? message displays, choose the subnet for the station and click Continue. 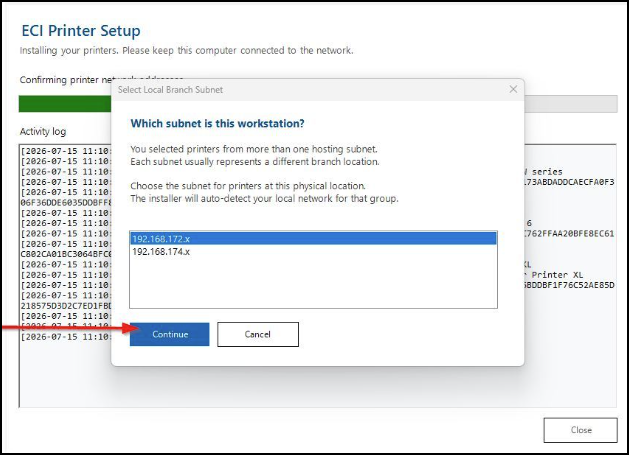
9. When the Printers for hosting subnet (your subnet) form displays, enter the first three octets from the station's Local IP Address, (in this case 192.168.1) in the Local subnet prefix field.
Make sure the printer is on to confirm the connection.
10. If the Printer Not Reachable message displays:
-
If the printer you are updating is on, select the Update IP button to try the connection again.
-
If you are sure the IP address is correct and the message displays again, click Install Anyway.
The Install Driver Utility updates the printer's IP address and installs the new driver on the workstation.